Crayonic Credential Manager - End User Manual
Welcome to the Crayonic Credential Manager (CCM). This application allows you to manage your authentication credentials, specifically FIDO2 passkeys, and handle requests for new credentials.
Table of Contents
1. Getting Started
To access the application, navigate to the CCM URL provided by your administrator. You will be prompted to sign in with your Microsoft Entra ID (formerly Azure AD) account.
Once authenticated, you will be directed to the main application interface.
![Screenshot Placeholder: Login Screen showing Microsoft sign-in prompt]
2. Dashboard
The Dashboard is your landing page. It provides a quick overview of your current status and any connected hardware devices.
Key Elements:
- Agent Status: Located in the top navigation bar. Shows if the local Crayonic Agent is connected.
- Green: Connected and ready.
- Red/Gray: Disconnected. Ensure the Crayonic Agent software is running on your machine.
- Connected Wallet: Displays information about any Crayonic KeyVault or other FIDO2 device currently plugged into your computer.
- Quick Actions: Shortcuts to common tasks like creating a passkey.
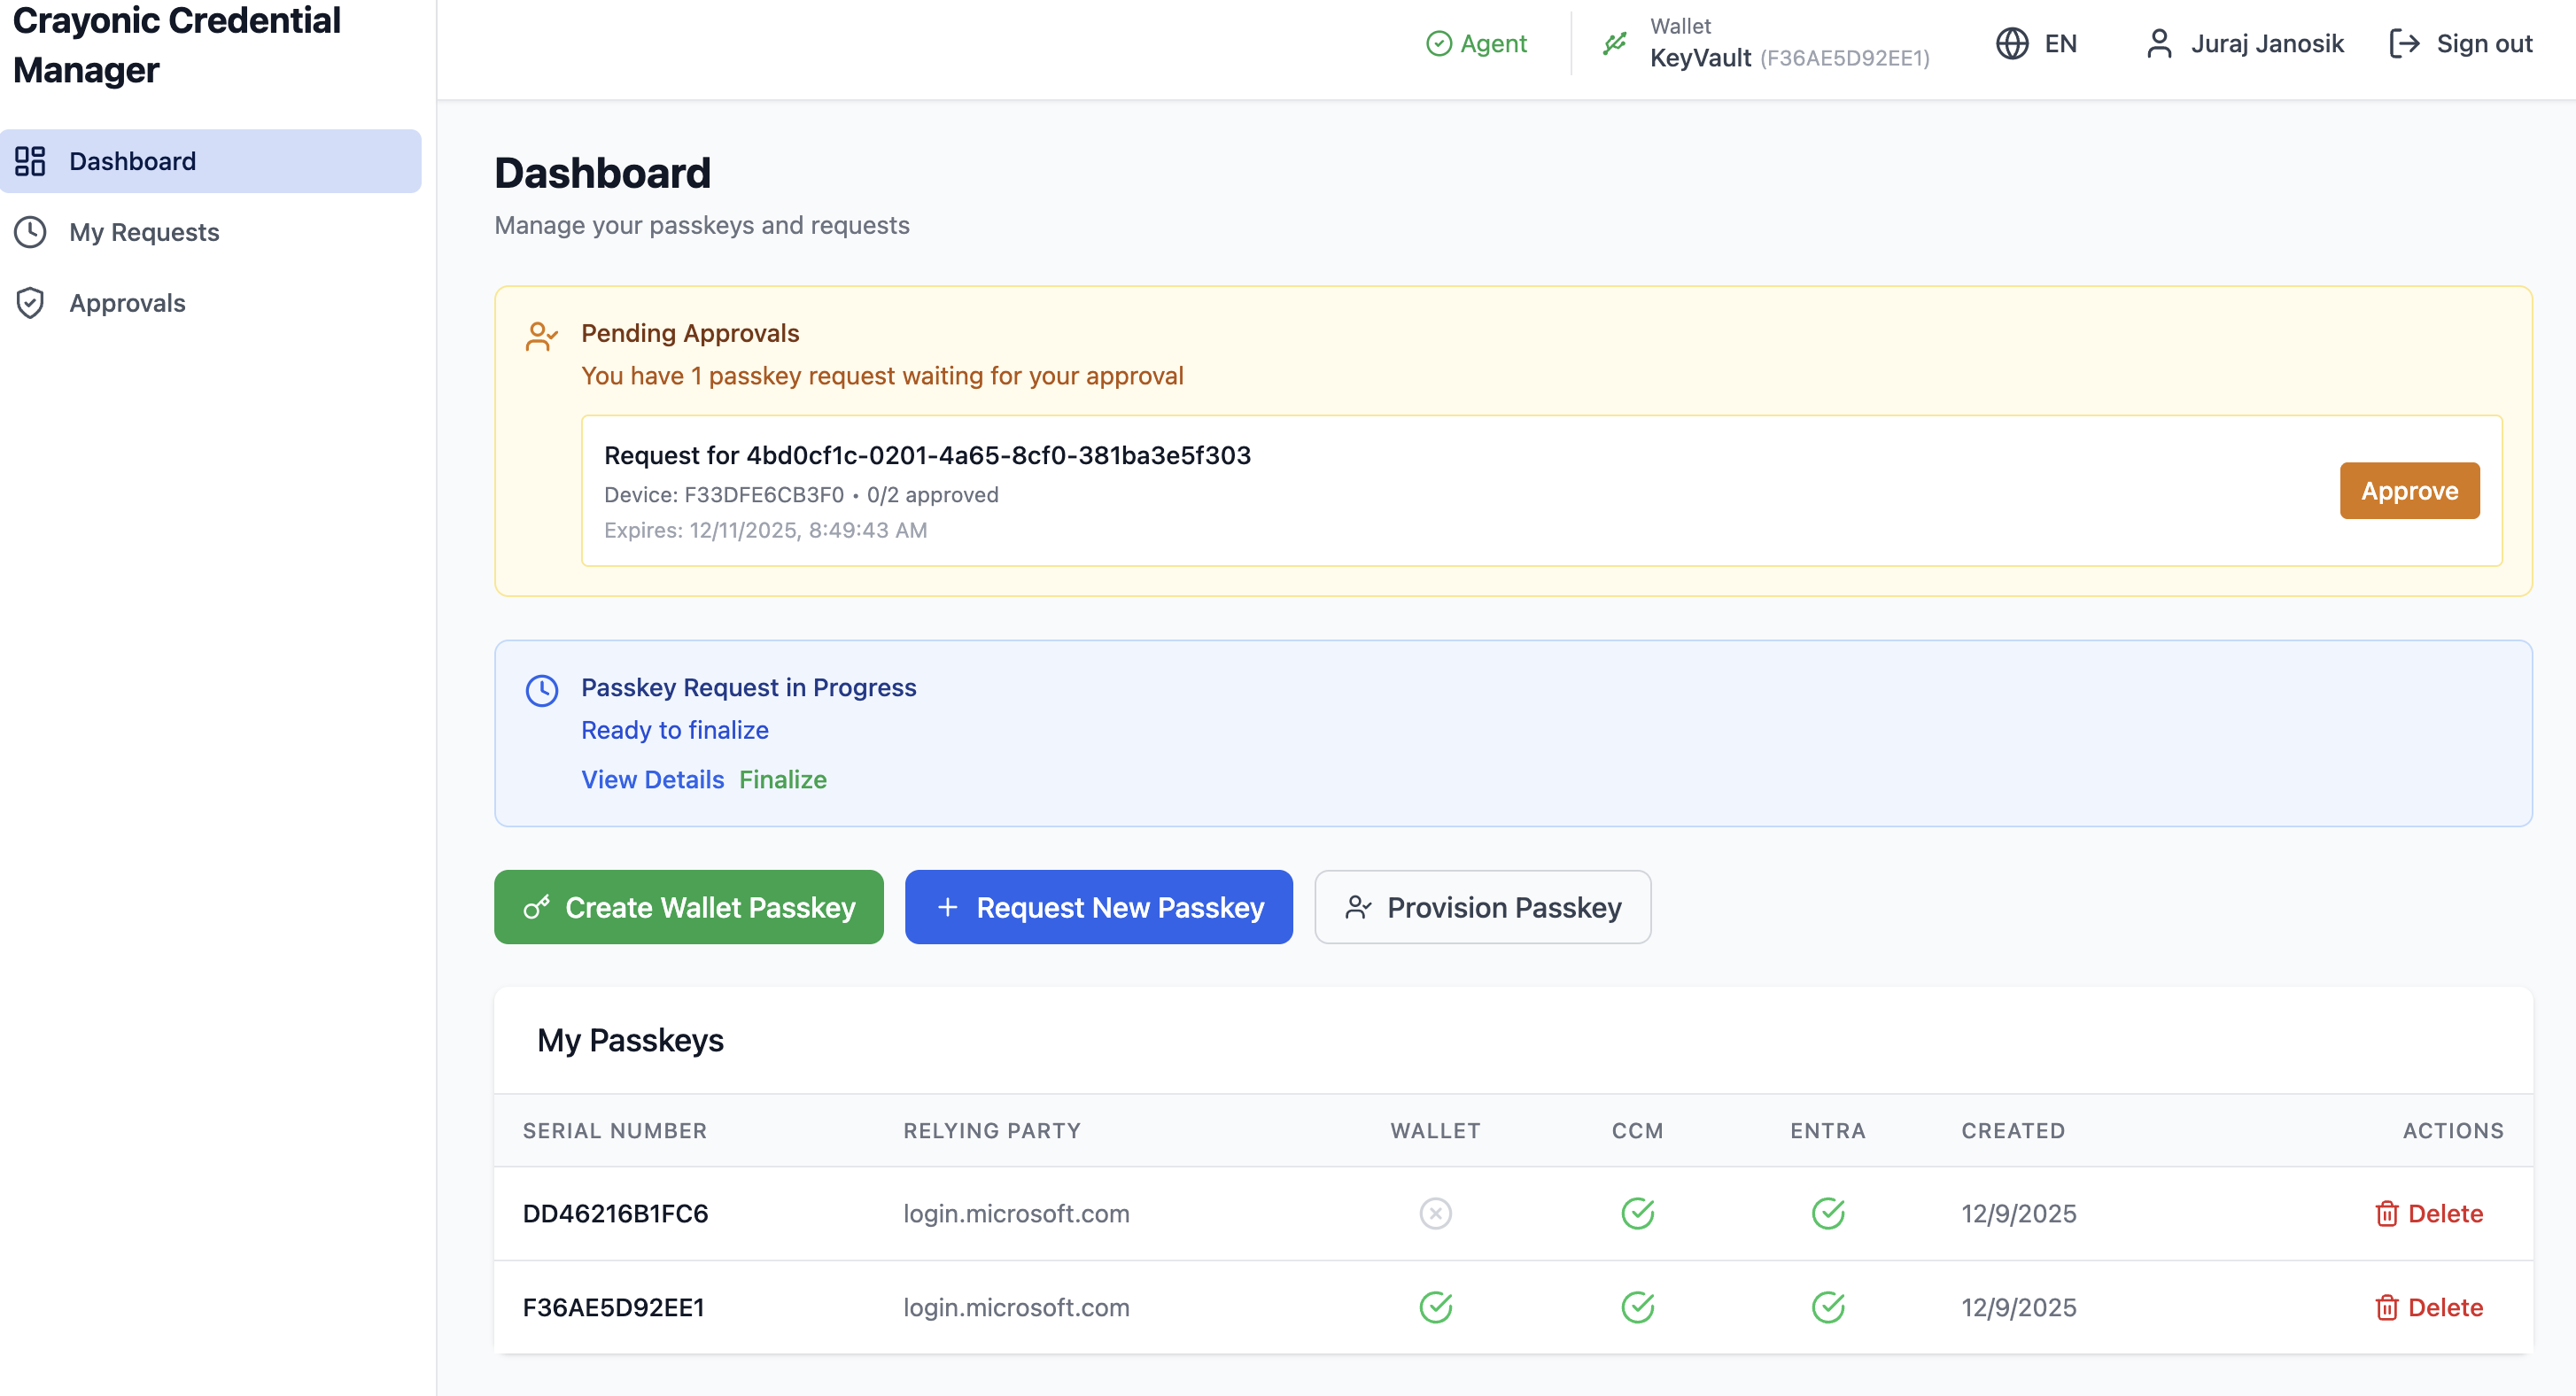
3. Creating Passkey
You can create passkey for yourself or on behalf of another user straight from dashboard. To instantly create passkey for yourself, click on Create Passkey button on the dashboard. Make sure your wallet is connected and follow the prompts to create a new passkey. Your wallet should promt you to touch the sensor and enter the PIN if required. (Make sure you have fingerprint or PIN configured on your wallet before provisioning passkey!).
If passkey creation succeeds, you should see the new passkey in the list of passkeys with 3 green checkmarks for Wallet, Entra and CCM. This means the passkey is fully provisioned and ready to use.
4. Deleting a Passkey
- Locate the passkey you wish to remove.
- Click the Delete (trash icon) button on the right.
- Confirm the deletion in the popup dialog.
Note: Deleting a "Graph" passkey removes it from your Microsoft account. Deleting a "Wallet" passkey removes it from the hardware device itself.
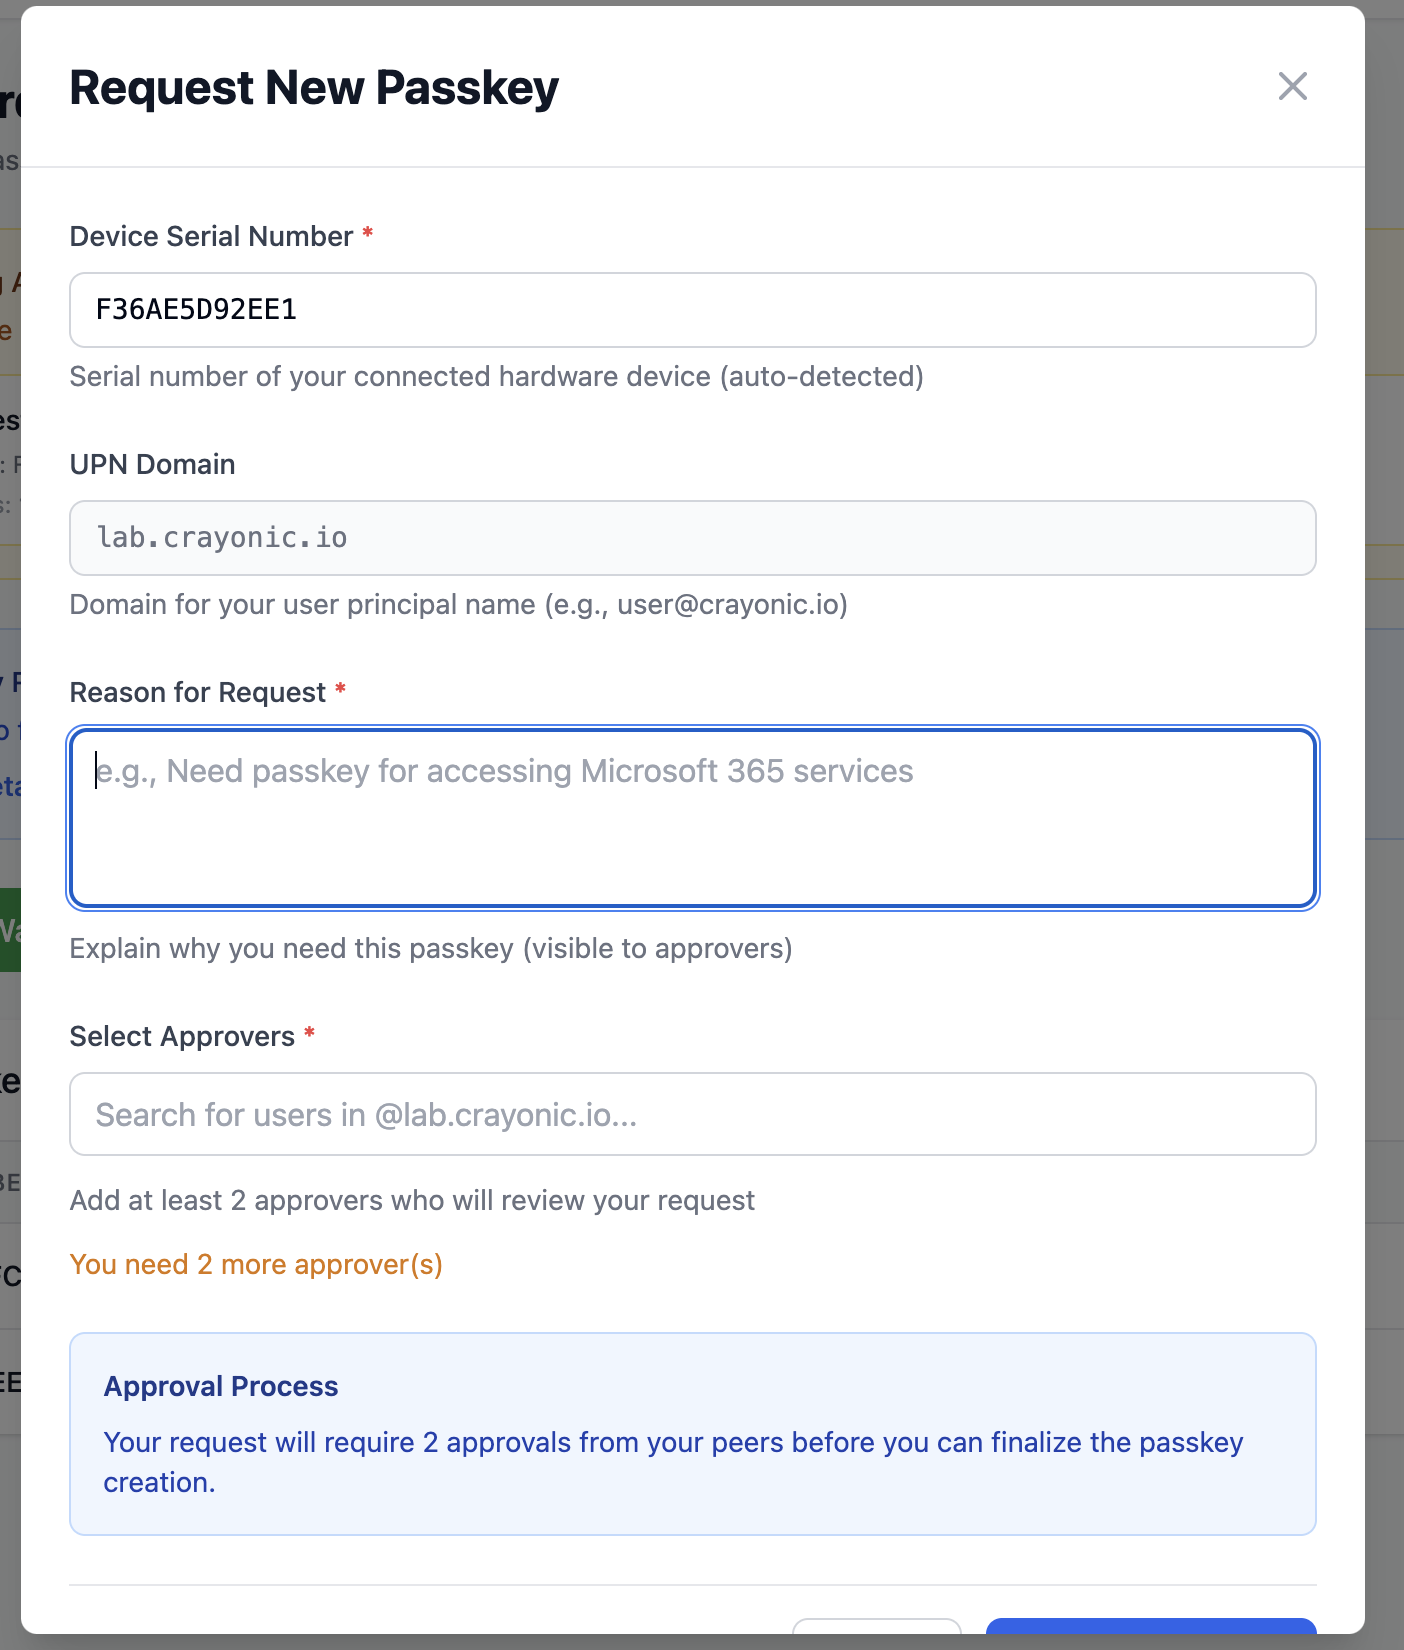
5. Requesting a New Passkey (Self-Service if enabled)
If enabled by your administrator, you can request a new passkey through a self-service workflow. This allows you to generate a passkey on your hardware wallet and register it with your account, subject to approval by designated approvers.
- Attach your new Crayonic wallet to your computer - this will allow to read the device information and verify its authenticity.
- Click the Request New button (plus icon) in the top right.
- Step 2: Request Details:
- Reason for Request: Enter why you need a new passkey.
- Approvers: Select who should approve your request (if allowed).
- Step 3: Submit: Review and submit the request.
5. My Requests
The My Requests page tracks the status of passkeys you have requested.
Navigation: Click My Requests in the left sidebar.
Request Statuses
- Pending: Waiting for approvers to sign.
- Approved: Sufficient approvals received. Ready to be finalized.
- Finalized: The passkey has been successfully created and registered.
- Expired: The request timed out before being approved.
- Cancelled: You cancelled the request.
Finalizing a Request
When a request status is Approved (threshold met): 1. Click the Finalize button on the request card. 2. Follow the prompts to create the credential on your device. 3. The system will automatically register the public key with Microsoft Entra ID.

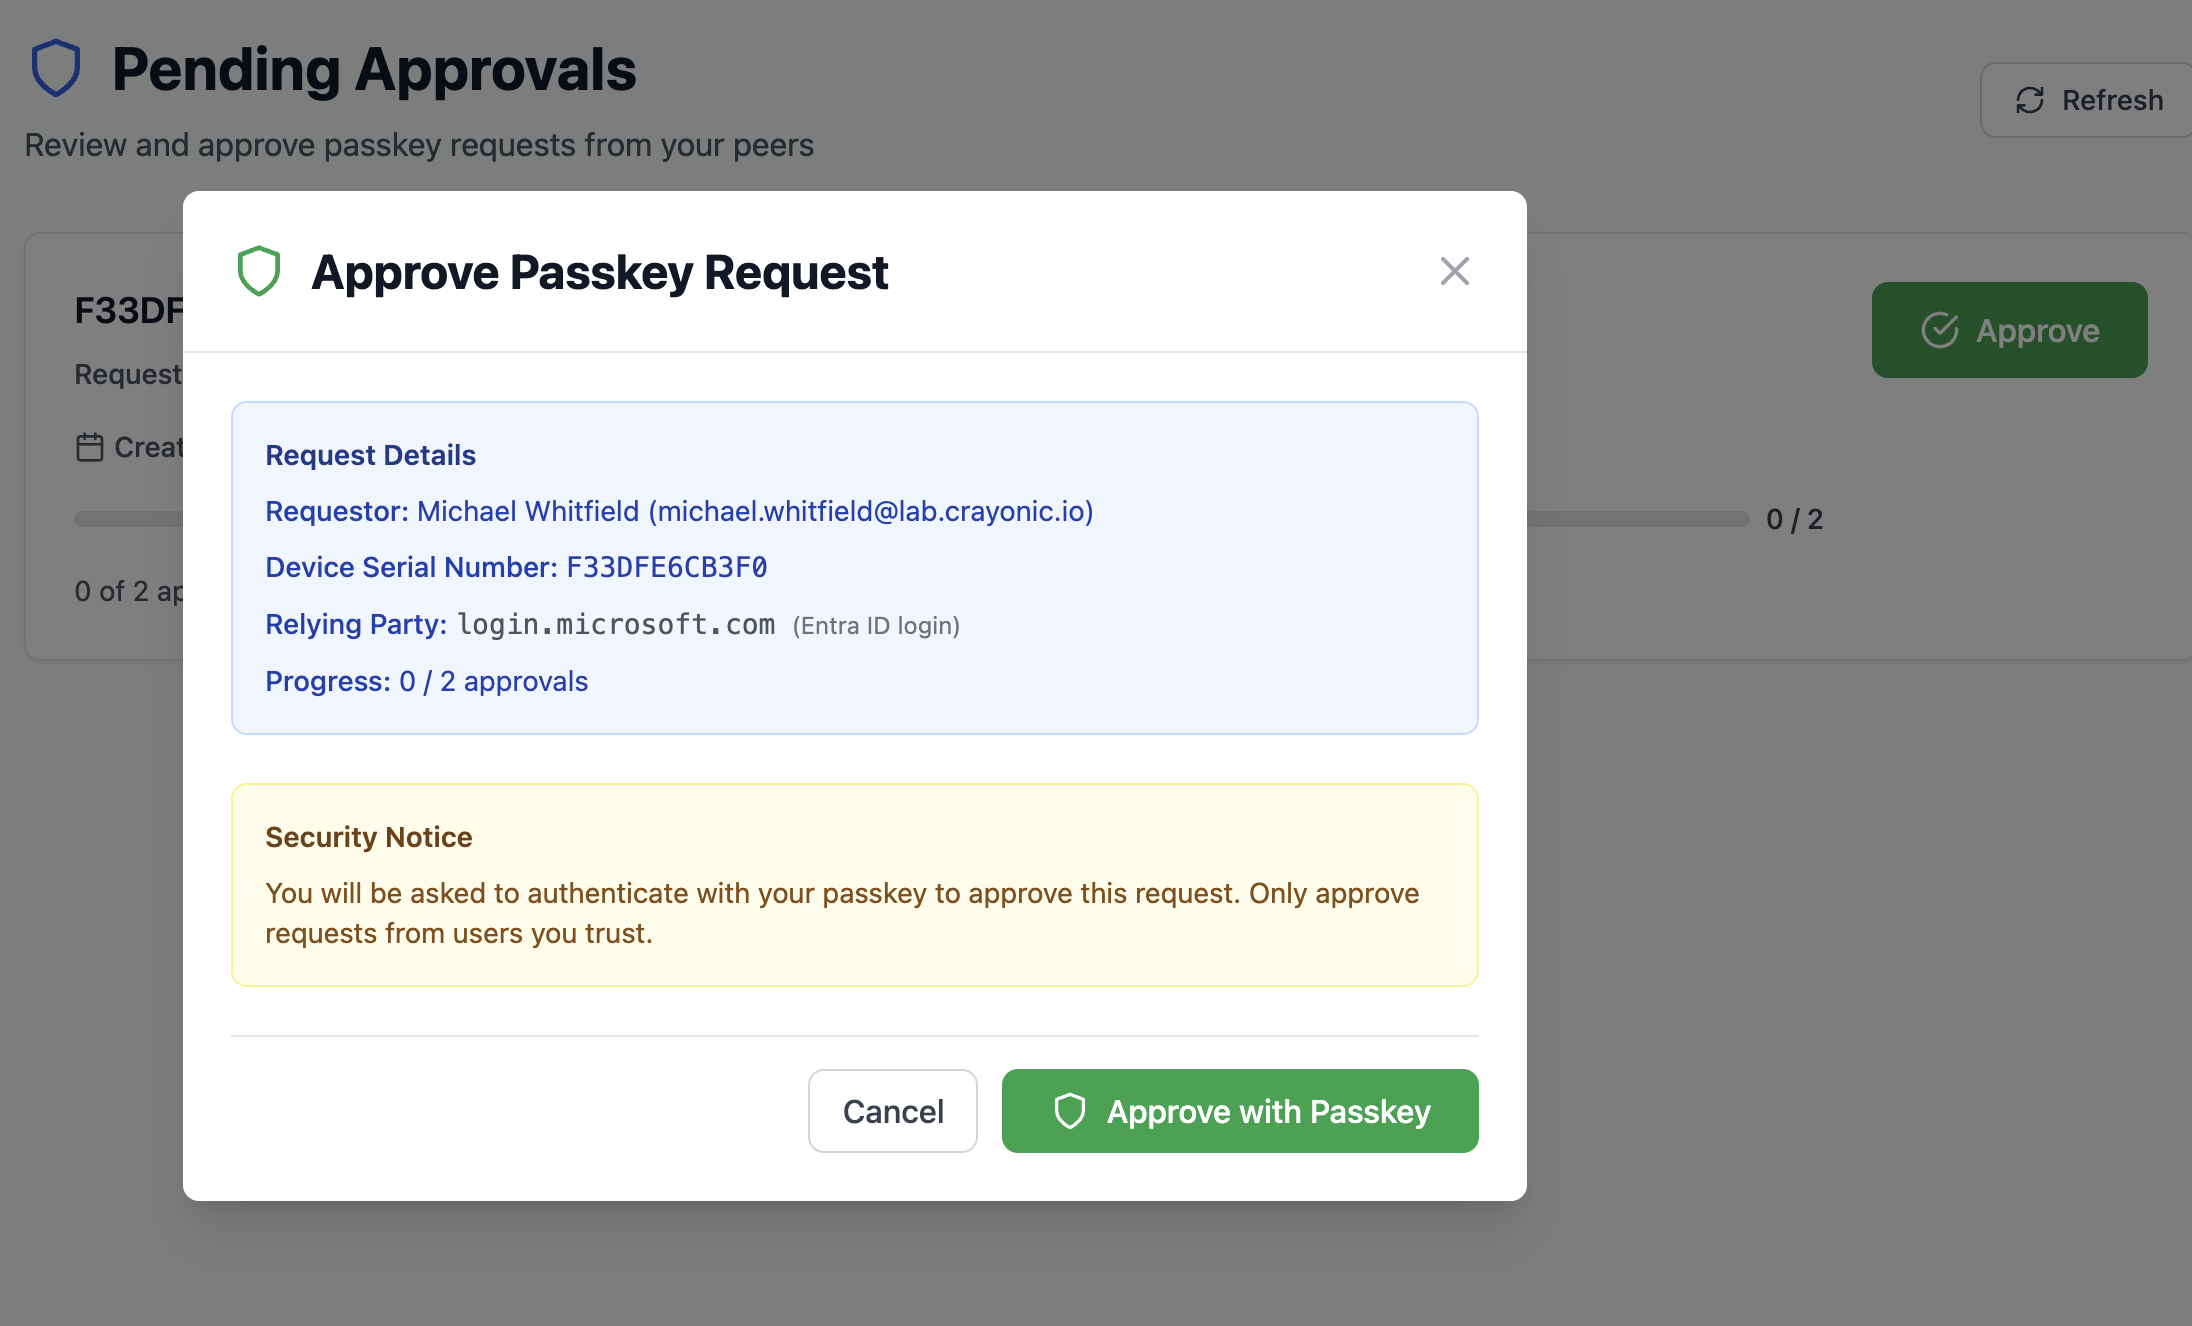
6. Approvals
If you are a designated approver, the Approvals page shows requests waiting for your signature.
Navigation: Click Approvals in the left sidebar.
Approving a Request
- Review the request details (Requestor, RP ID, Creation Date).
- Click the Approve button.
- Sign with Passkey: You will be prompted to touch your own FIDO2 token to cryptographicly sign the approval. This ensures secure, non-repudiable authorization.
Important: You must have a valid passkey registered in the system to act as an approver.
Provisioning a Passkey on Behalf of Another User
You can provision passkey for your colleagues. This is useful for onboarding new employees or replacing lost or damaged security keys. However, you will need other colleagues to approve the request before you can finalize it. Number of required approvals is defined by your administrator.
Provisioning is synchronous, meaning you need to have the target device connected and ready to create a passkey. You will also need co-signer standing by to approve the request.
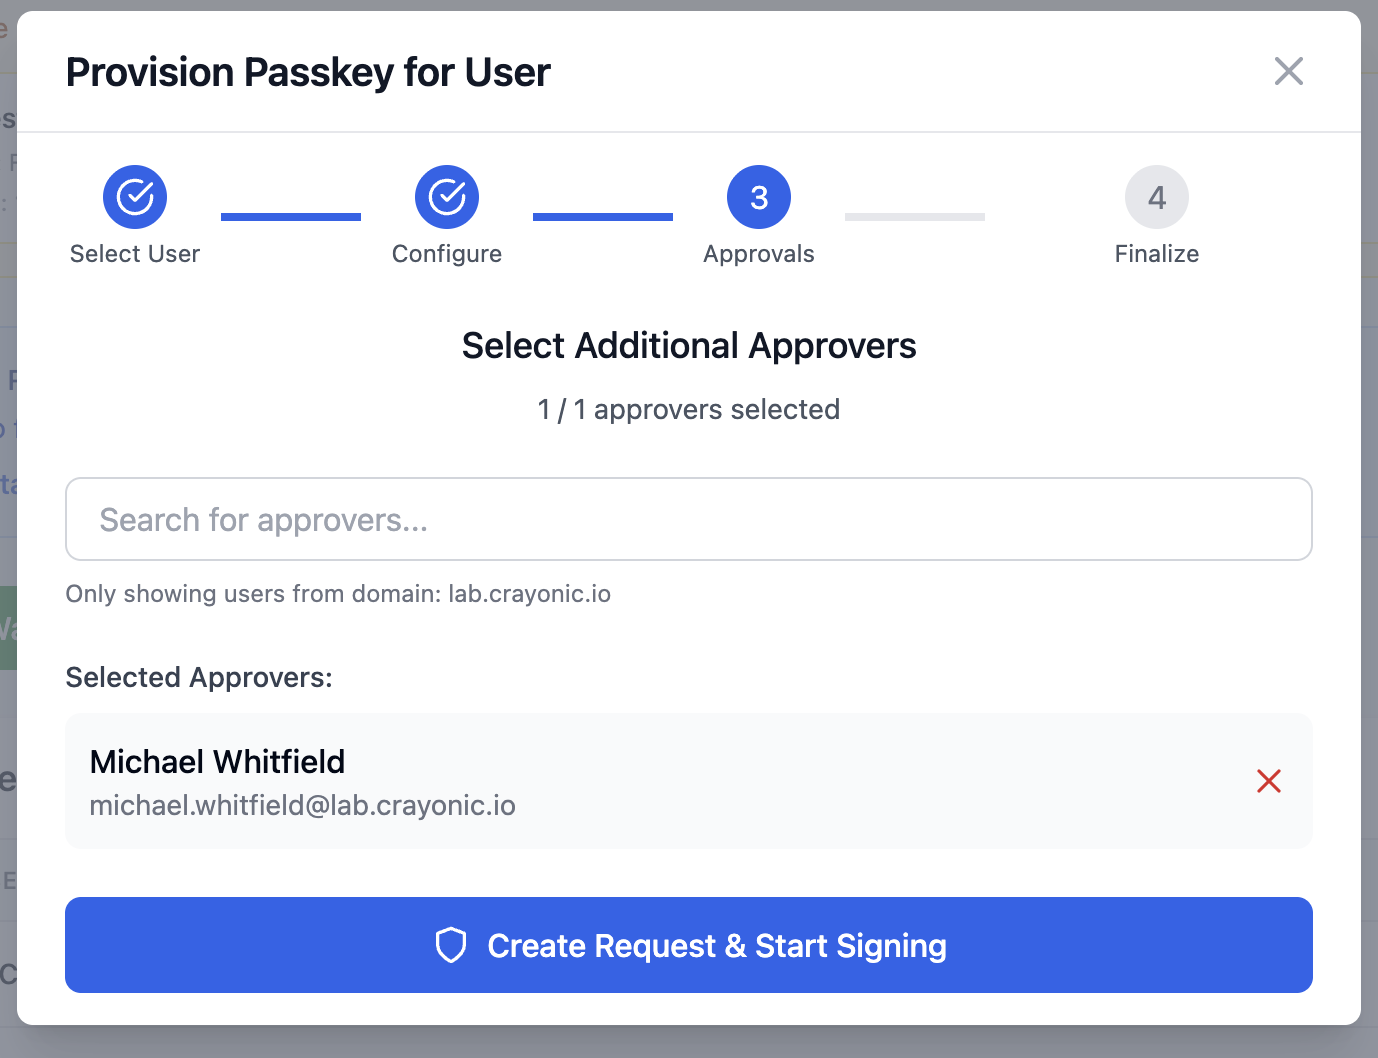
1) Start provisioning and select your target user who needs new passkey.
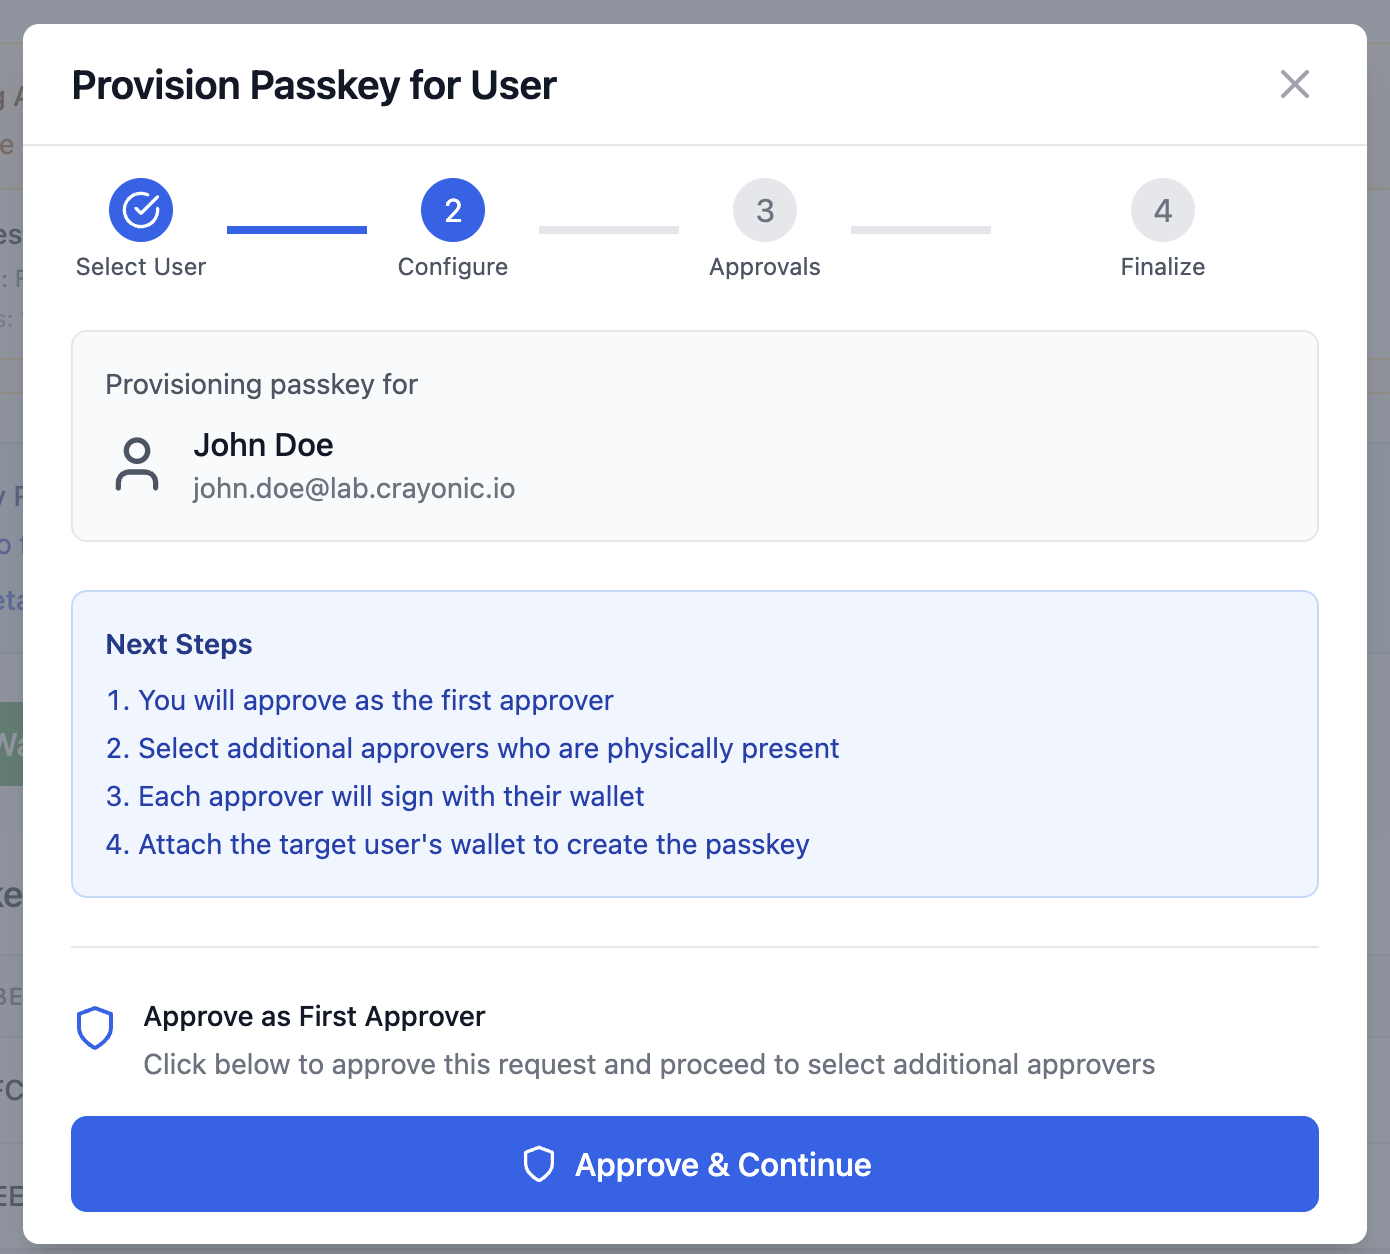
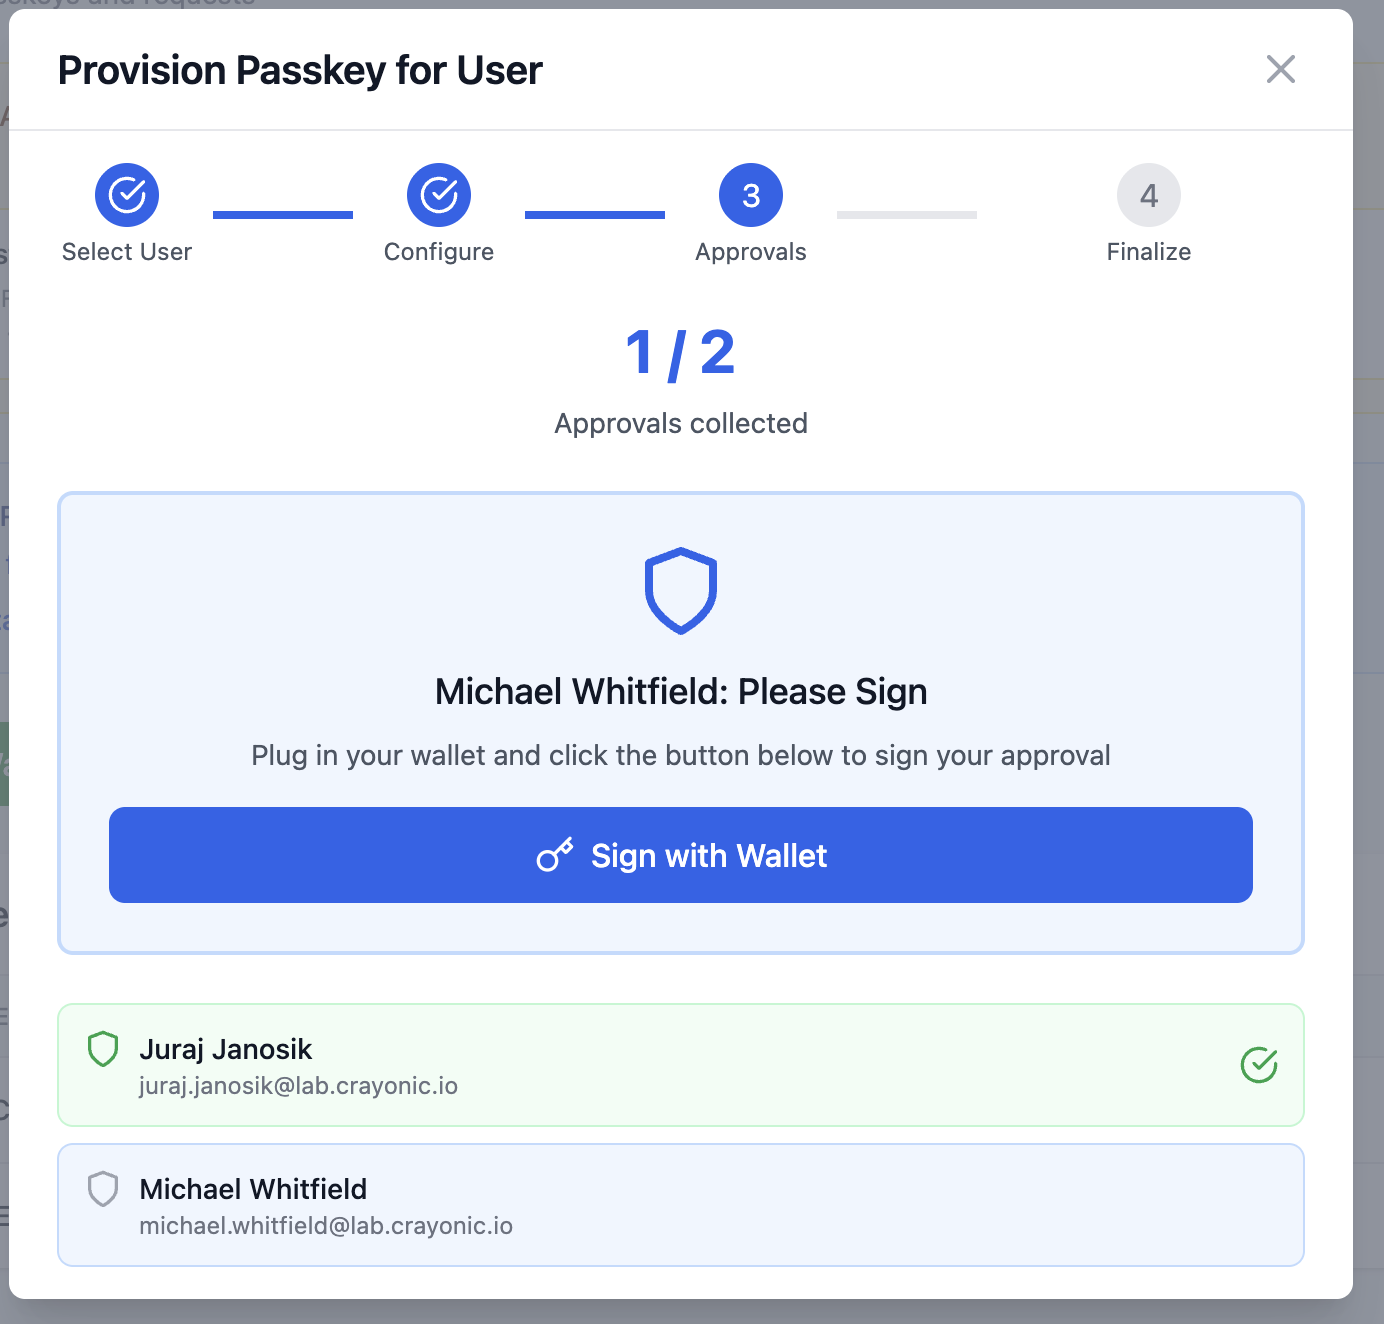
2) Select approver(s) and submit the request - you will sign first immediately.
3) Co-signer approves the request by attaching their wallet and authorizing the transaction.
4) Attach new Wallet to finalize the request and issue a new passkey to it.
!
7. Profile
The Profile page displays your current user information and system permissions.
Navigation: Click Profile (or your name) in the top right corner.
- Account Info: Name, Email, Tenant ID.
- Permissions: A checklist showing what administrative capabilities your account has.
- Roles: List of detected Entra ID roles assigned to you.
![Screenshot Placeholder: Profile page showing user details and permission matrix]